Tuesday, July 16, 2013

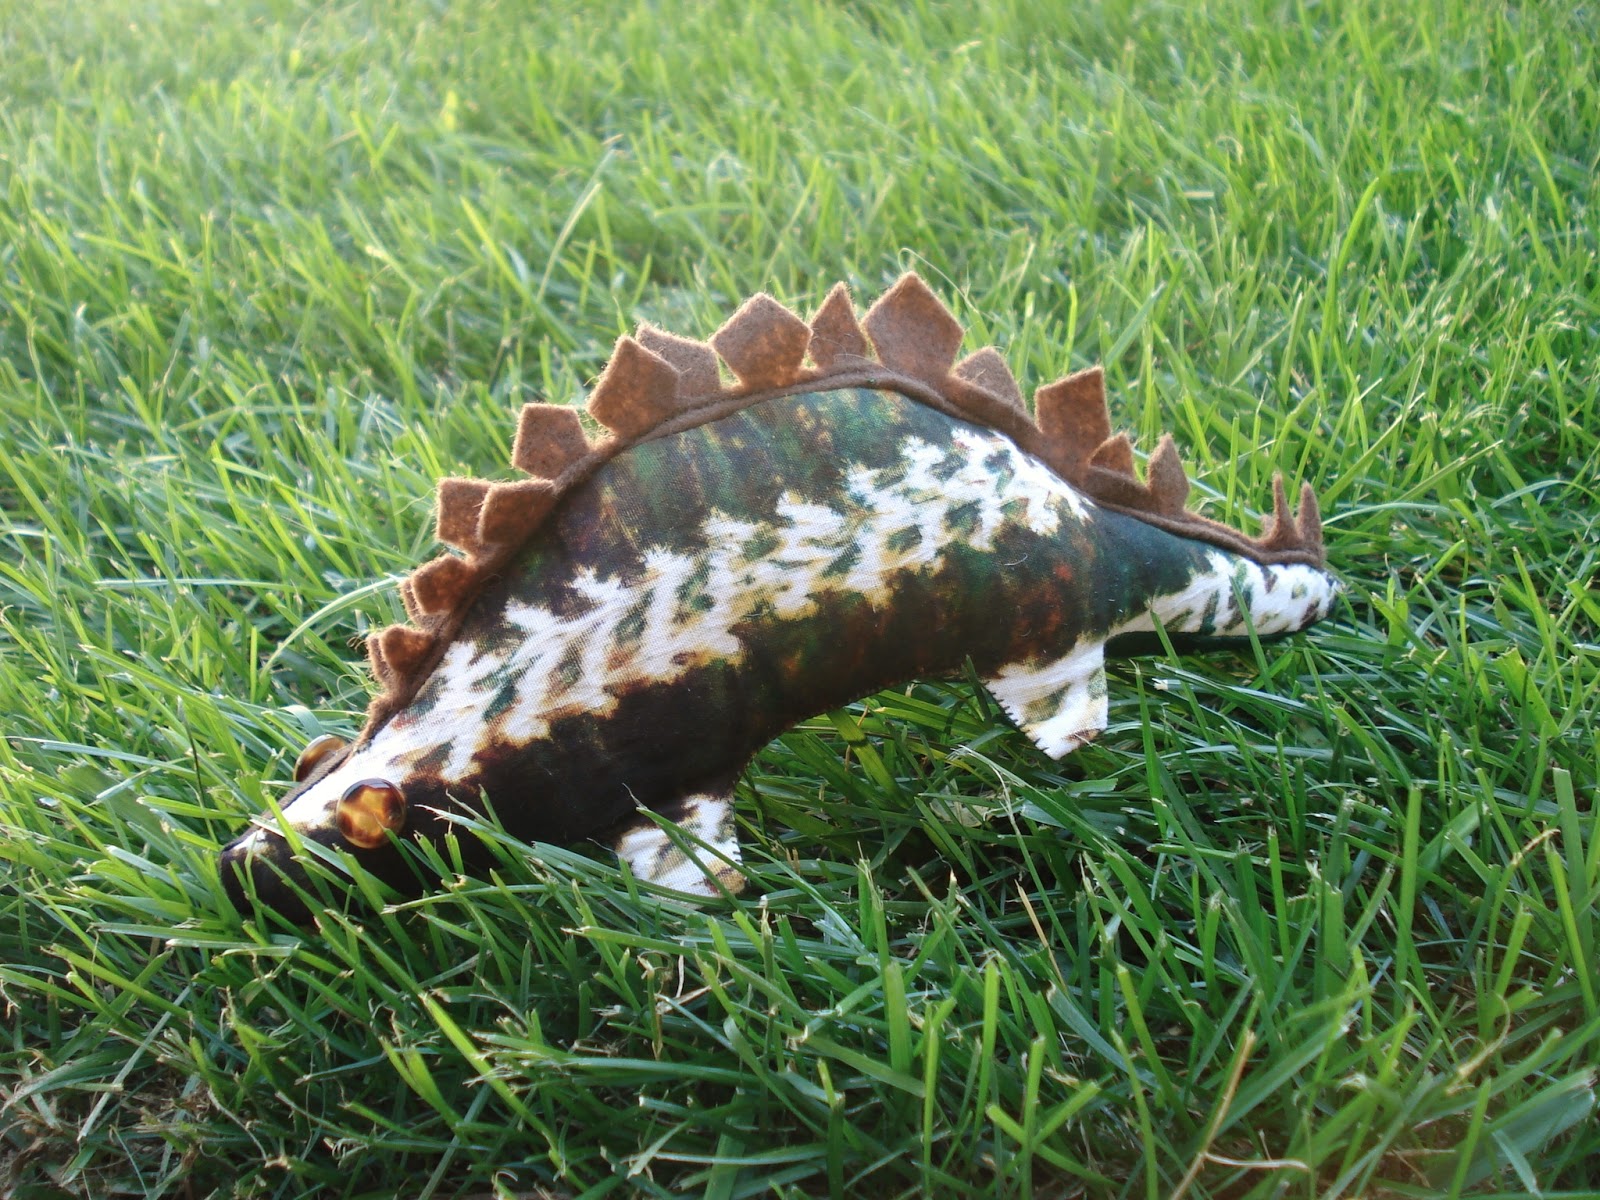
Stegosaurus Softie


      Ever since I saw this pin and attached tutorial for a felt stegosaurus, I knew I'd have to make it eventually.  I am married to a huge paleontology buff -- we have dinosaur toys models on shelves in our bedroom; I'm not kidding.  Then my sister sent me fabric scraps from Africa (she's been volunteering as a teacher in Tanzania, and will be returning next month -- shameless plug for her blog here) and I knew I had to figure out how to use those. 

      The tricky thing about this project was that the tutorial gives you a pattern for a felt softie, but I needed one with fabric in mind.  I ended up drawing my own pattern (don't do that, just use the printable one the tutorial gives at the end of the post) and adjusting it for fabric.  It was certainly a challenge to have to think about how to make this work with seam allowances.  I knew from the beginning there was no way I'd use anything but felt for the spinal plates!  I screwed up the sewing of the felt to one fabric side of the body, so I was trying to fix that for awhile afterward.  It turned out alright, but I wish I'd had little black beads for the eyes like the original blogger had.  Since I wanted my stego to have a face as soon as I finished him, I made do with what I had.  My husband approved, anyway. :)


      Isn't this African fabric great?  I used a solid green portion of the same fabric for the underbelly.

Baby Door Muff


      So a friend of ours is having a baby this fall, and that is all the impetus I need to go nuts with all the fun baby craft and sewing projects!  I have tons of them pinned to my sewing for kids board on Pinterest, but I thought I'd start off with this one, since I expected it would be a quick project and something I could make with materials I had on hand.  This baby door muffler or 'door muff' is available for sale on Etsy in various colors.  It lets you open and close the baby's door without the click, so you don't wake the baby, and keeps toddlers from locking themselves into a room.

      I had some denim scraps left over from the denim quilt I finished recently, so I thought I'd use some of those.  I also wanted my door muff to be gender neutral, and denim works pretty well for that idea.  Basically, the door muff ended up being three layers of denim, with the ends sewn down around two elastic hair ties.  The elastics serve the same function as the ribbons, but are a little less girly, and perhaps more straightforward if you ever want to take it on and off.  It sounds simple, but it took longer than you might expect to get the measurements right.  Also, my sewing machine was being extremely uncooperative.  Anyway, the basic finished product was boring, so I added two felt stars to hint at a night sky theme.  Here it is!


Sunday, July 14, 2013

Denim Rag Quilt

      When I saw this picture on Pinterest (no real link attached), I thought it was a brilliant idea for old jeans, because you could make a quilt with such character, and reuse clothes you might normally donate or toss.  I was given a pair of very light blue colored jeans by a friend, and I knew they wouldn't be worn, but the color was unique enough to inspire me to make this happen.
      This quilt was the first I did 100% on my own, start to finish.  My only previous quilt was from a kit, with all the pieces pre-cut, including the fringe (it was a fleece rag quilt).  Although this was a little intimidating, I loved the idea and wanted to make one for a picnic blanket, (that I could maybe even use this summer) so I was motivated.  I bought the denim from thrift stores in the form of denim dresses and jeans at good sale prices.  This way, I avoided buying denim fabric new, which runs $12/yard, and got the additional character pieces like pockets and pleats (from a dress bodice).  I recommend against doing what the picture shows, with all the seams running across and sewing on waistbands to keep the labels, because it was hard enough to sew through 4 layers of it when all my fabric was smooth.
      I also made sure to get denim that was generally lighter weight (my machine is by no means industrial strength).  If you do buy the denim new, I think my weights were in the 7-11 oz range, and I recommend keeping it under 11.  I say this not only so you don't kill your machine but because if you go heavier the finished quilt, especially if it's bigger than mine, will weigh a ton!  I wasn't sure how well the quilt would turn out if I left it fringed all around the outside, so I went ahead and put some quilt binding on it.  It was really easy, but I think you could go either way.  I think it makes it look a little more put together, and hopefully it'll hold up a little better long-term.
      If you're going to tackle a denim quilt, make sure you buy the special denim sewing needles for your machine, some heavy duty thread, and definitely spring action sewing scissors like these.  Here's my finished product! I'm pretty proud of it.


Here's a close-up so you can see the cool square with buttons I got from a pleated dress bodice.   I ended up with 4 pockets, so I put those by the corners so I can hold down napkins or keep track of silverware on a picnic.


      I also used the ties from one of the denim dresses to make a tie for my blanket to keep it neat when it's rolled up. 


Thursday, April 18, 2013

Delicious Soft Pretzels!

      I have about a million pins on my "fun food" board on Pinterest.  I've been wanting to try so many of the recipes, and now pretty much whenever I decide to bake something, I go to my board and find the right pin.  Because of this, if you look for soft pretzel recipes, you'll find I have about 5 different ones saved!  I finally got around to trying one, and I found the easiest one to try -- no dropping in boiling water, pretty simple prep, and it takes about an hour to make.

Don't these look mouth-watering?

      This "Auntie Anne's copycat" recipe is care of Yammie's Noshery. Since it's just my husband and me, I halved the recipe so we wouldn't be pigging out too excessively.  When I first made the recipe, I used 2 and a quarter cups of flour, and, like some of the original poster's commenters noted, the dough was quite wet.  It made it pretty difficult to work with, even as I floured my hands when I was shaping it into pretzels.  The second time around, I added a bit of flour, just under 1/4 cup, and it was perfect!

Way easier to knead with my hands (rather than the mixer) if I wanted to.

Lovely little pretzels!  I would make them skinnier if I had a bigger surface to roll them out on.

Since I didn't roll them really skinny, they puffed up and became all one piece.  Still delicious!
      One more thing -- the first time I made them, we had kosher salt, which was good.  The second time, we used coarse sea salt, which really gives it that pretzel look.  Just be careful you don't oversalt them, the larger salt is stronger tasting, so a little goes further than kosher salt.

Wednesday, April 17, 2013

First Home Christmas Ornament

      In 2012, my husband and I enjoyed our first Christmas since we'd been married, and in our first home, an apartment in Mississippi.  In the months leading up to Christmas, I went a little crazy with homemade Christmas ornaments -- actually, it was mostly during the summer, when I was home from work for several weeks with a broken elbow.  One of the ornament ideas that we had a lot of fun doing was salt dough ornaments.  This pin offered the idea of saving the imprint of the key to our first home.  

       Unfortunately, it didn't have a salt dough recipe attached, so I changed the link to this blog post, which is the recipe (albeit much smaller scale) we used.

       We made a fraction of a batch, so this was all it made.  Apparently, I didn't take more photos of the one with our rings imprinted on it, so I'll just tell you that I later labeled it (on the back) "Our First Christmas as Mr & Mrs".  If you make them, don't forget to poke a few holes in unobtrusive places!  If you don't, you can get unsightly darker spots.

 My husband is obsessed with dinosaurs -- see my other post about fruit snacks. :)

We don't have kids, so we used the handprint idea (from the blog post with the recipe) on our cat!

Simple as that! I wrote our address and the year on the back of this ornament.


A Helpful Home Tip

When I spotted this pin on Pinterest, boy, was I kicking myself!  


      We moved into our apartment about two months ago, and from the beginning I was not very fond of the bedroom space that required us to put our bed with the headboard by the window, and I hated that the window was off-center in the room.  I work nights, so I need my bedroom to be seriously dark.  We have morning sunlight on this window, which isn't bad, but I still have a dark brown curtain to block out the light.  In our old place, the window was in the corner and it didn't really matter that the brown curtain didn't add anything to the room.  Here, though, it's front and center visually, so I had to do something about it.  With the inspiration from the photo above, I had my husband redo the curtain rod and fixed it up nicely.


      This is after he changed the curtain rod. It looks slanted, but it's just the angle. The black rod rests on the vertical blind holders that came with the apartment. Thankfully, they were fine with us removing the blinds, because I got tired of my cat running through them right behind our heads when he wanted to look out the window at the crack of dawn.
      Before we changed it, the brown curtain was on the silver rod, slightly above the window, but it only ran the length of the black rod in this shot, so it looked pretty off-center, not to mention dead boring.


      This (above) is essentially what it looked like before (pardon the blurry picture). I have the brown curtain there now to block out more light.  Now, these curtains (below) block out nearly all the light, and are much more visually satisfying.

 The results!


      If you're wondering why our bedding is so eclectic-looking, it's because we're using our warm-weather comforter.  It looks better with our other one, but alas, my husband makes more heat than an electric blanket set on high.

Monday, April 1, 2013

Cereal Box Drawer Organizer

Since we moved, I've been reorganizing our apartment.  It's been especially important for my sanity since we downsized.  This pin offered a great solution (with stuff I already had!) for the messy junk drawer in my kitchen, so I thought I'd give it a try.  


If you're thinking about trying this too, go to the original blogger's post for the step-by-step how-to's: http://www.thestonybrookhouse.com/2012/03/messy-desk.html

Here's my process:
I was already using some little boxes in my junk drawer, so I was able to keep a few and I already knew how they might fit in the drawer.  I recommend pulling the drawer completely out if you're able to, to be able to double-check that your finished product will fit.


Having just moved, there is a plentiful supply of cardboard around.  I used a piece of cardboard on the bottom of my assembled collection of boxes to add support so that it could last longer, being able to function as one whole piece.  Also, lots of duct tape!


I covered it in cute wrapping paper I found on clearance at Target.  This project really can be done in an afternoon; it didn't take long at all for me.

Here it is in use!


In case you're wondering why we have a squirt gun in our junk drawer, it's because we have a cat who can be very bratty.