Showing posts with label sewing. Show all posts

Tuesday, June 3, 2014

Nursery Decor - In Progress


     Oh, Dumbo!  Such a classic movie, such a cute little guy!  Yes, I know it's sad, but it's also good.  I decided recently that I love elephants, and since we're big Disney geeks, Dumbo seemed like a good theme for our baby's area in our room, and one day, bedroom.  I also liked that it works as a nicely gender-neutral color scheme, of gray, red, and yellow.  It helps that it doesn't clash much with our bedroom's existing red and brown color scheme.  Here's a preview of the decor in-progress.

     First up, I started on some felt elephants for a mobile.  I loved this mobile on Etsy, so some of those ideas will probably show up in the final product.  Here's what I have so far.  I'm proud to say that these elephants and the Dumbo were not only all made by hand, but also from patterns I created!  The elephants are two-panels, and Dumbo is three so he's flying.  I actually sketched the elephants based on Google image searches of elephants in profile, and of course I had plenty of pictures on which to base Dumbo.


     To go along with the theme, I decided to make some customized bedding based on Dumbo's collar.  I started out just planning to make a flannel rag quilt of three layers, but partway in, had a brilliant idea.  I had already made this quilt to fit standard crib size, so that we can use it for a lightweight bedspread when our little one is using it as a toddler bed.  I realized that if I made the quilt with only two layers, and I left one end of it open, I could later stuff a toddler comforter (any kind or design!) inside and use it as a duvet cover!  So that's what I did, and now we have two options to keep it in use year-round.


     Strip quilts are seriously the easiest things!  I was actually bummed that this quilt went so quickly.  I have been trying not to zip through projects so fast since that tends to make me also zip through my fabric and craft budget!  At least making it a rag quilt adds some time and effort.  I was once again very grateful for my spring-loaded fabric scissors, making the fringe cutting part less painful on my hand.

     Also, check out what I found at Target! It's too perfect!


Turn an Adult T-Shirt into a Newborn Gown


     Over time on Pinterest, I've collected a lot of pins, so it's not really that surprising that I'm this excited to finally make use of all the baby item sewing tutorials I've saved.  One such pin links to a great tutorial on This Mama Makes Stuff for turning an adult t-shirt into a newborn gown.  I was glad to make use of this pattern because I had set aside a couple of Andrew's shirts that were holey, but unique, and nicely worn to a thin softness.  After I made one, I asked my dad if he wanted to contribute any old t-shirts and he gave me a bagful, too.  My only comment on the tutorial/pattern is that the neckline's curved hem really is tricky, so don't beat yourself up too much if it's not perfect.  Mine certainly weren't.  See for yourself:


Here are my finished gowns! First try, with Andrew's shirt:


     This one's from my dad, who as an avid poker player gets plenty of t-shirts from casinos.  The funny thing is, his name is actually Jerry, too, so I thought it was pretty appropriate that his grandson wear something making him "Jerry's Nugget". :) For this one, I used the logo as a patch, because the back of it was scratchy.  This way there's another layer between it and sensitive baby skin.  Always an option!


Bath Apron


    At some point, I saw this pin with a link to an Etsy listing for a pattern for a bathtime apron.  Having given quite a few baths as a babysitter, getting awfully wet in the process more often than not, I realized how great this apron would be.  I'm sure the pattern is great, and especially helpful for anyone intimidated by sewing, but I enjoy the challenge of figuring it out on my own.  I found a lovely soft yellow towel at my favorite thrift store, Savers, on a 50% sale day, and paid just $5 for it!  This is, of course, part of why I don't mind just jumping in to try things -- they are usually pretty low-risk investments. :)  I got some navy blue binding at JoAnn and for my accent fabric, I used a section from a button-up shirt I plan to make into an apron (like these).  It's hard to show you what it looks like since I don't have a cute baby to model with yet, but you get the idea.  I left the length of the towel the way the Etsy seller did, because I figure it'll be helpful to dry off a kiddo and because I quickly found that sewing with terrycloth is kind of a pain.  Best to keep the original seams whenever possible.  


Baby Apron Bib

      I love Pinterest.  All the best things are on there.  This pin lead me to Craftiness Is Not Optional, and her pattern for a baby bib to beat all other baby bibs!  


     The pattern is just $ 6, and since I wanted to make some for us and some as a gift, that was no big deal.  I knew from babysitting for over a decade that this bib had some excellent potential, because it doesn't velcro (to be pulled off easily by small hands), or button (cute, but can be a pain), and it goes behind the baby's arms so that ideally the bib doesn't get pulled straight up quite as easily either.

     I went to JoAnn's armed with a coupon, but found that they had a sale on flannel for a much better deal than my coupon. Yay!  I definitely bought more flannel than I had intended to that day, haha.  The friend for whom I'm making this as a gift has a new foster daughter who is 8 months old, so I got some cute girly fabric, and also some gender neutral fabric since we didn't know what we're having. (I made mine essentially reversible, with flannel on both sides. The fronts are pink and green, with the cute brown on the back for both.)

     The pattern is easy to follow, and the bibs themselves are super quick! I was surprised how fast I was able to churn out three of them (in one night).  I love the results, and my friend reports that they work well for her little one, who's a messy eater to boot.

     My only comment on the pattern is that the binding you use for the outside edge really is 'too short' on purpose! It made me nervous, but after you try it, you realize it has to be shorter so that the bib curves on baby's shoulders the right way. If you made it longer, it would work, but would fit more loosely and thus not be as effective. See?


Saturday, May 17, 2014

Burp Cloths

     I did warn you I'm going a little nuts on the baby projects, right?  Well, I am.  Today's pin is about burp cloths.  There are lots of kinds of burp cloths, and while you wouldn't think that the shape matters so much, I spotted these from Homemade by Jill and immediately knew they had potential to be better than most.

     I loved the peanut-shape, and that they focused on absorbency without sacrificing it for cuteness.  As an example, some people have made burp cloths as gifts from prefold diapers (flat cloth diapers, with a thicker middle section) that have fabric added to them, but they don't always think about the fact that the fabric they add, often quilting cotton, decreases the absorbency of the cloth.  I love that these are both cute and absorbent, because of the flannel.  Note: when I printed the pattern from Jill's website, I thought it printed too big, because it seemed huge.  I didn't think about seam allowance, shrinkage, and just generally wanting more coverage, not less, while burping an infant.  Thankfully an experienced mom made the pattern, not me. :)


     For various reasons, I made some changes to my burp cloths compared to how Jill does hers.  Instead of using batting, I used two extra layers of flannel; I can't comment yet on how they compare as far as absorbency, but I'm not fond of using batting and I got the flannel on a great sale.  The other thing I changed was to have finished edges instead of ragged edges.  I love flannel rag quilts, but I know how much they fray, and I thought these might be nicer as gifts with a more finished look.  Because I was using the extra flannel layers instead of batting, it was easy for me to sew the burp cloths with the outsides facing in, flip them around, and sew once more.  I have no idea how I would have done that if I had been using batting.


     I found that my edges looked nicer on the cloths I sewed a bit further from the edge the second time around, but either way (whether you have a 1/8" allowance or 1/4" allowance) they look great.  Aren't these fabrics cute?

Wednesday, July 17, 2013

Felt Needlebook

      I really enjoy working with felt, so when I stumbled onto a Pinterest board dedicated to a ton of felt crafts, I had to do at least one.  I found this pin that inspired me to make a needlebook.  That way, I made something cute and useful with felt.  Here's my inspiration:

Here's mine:


      Of course I wanted mine to be purple, and it worked out well to use some scrap fabric as a bit of decoration.  I thought I'd need a pocket for my cross-stitch needles, which are more blunt, but my felt is not as tightly woven or something; they were fine.  I made some labels for mine since I wanted to keep track of the several kinds of needles I have.  There's also a blank page at the front for basic hand sewing needles.  I really like how it turned out!  Cute and functional, if I do say so myself.

Tuesday, July 16, 2013

Monster Coloring Totes

      It's probably no surprise to any visitor of this blog that I am an avid Pinterest user.  I love the sharing of good ideas, whether they are for date nights, kids' activities, recipes, or crafts.  I also love the way that people in the blogosphere can inspire creativity in each other.  This pin links to a blog with these adorable monster coloring totes, but they're actually the second version of them (she links back to the original blogger).  Since creativity is not exactly my greatest strength, I basically copied the second poster's design.


      Since I am also cheap, I picked up two tote bags on clearance at JoAnn crafts instead of making the bags too.  This ended up being the harder way to do it, in a way, since I had to sew and then attach the monster face to the bag with more difficulty.  I made mine to size for crayons, but you could make the faces and slots longer for colored pencils too.  Here are my two, all laid out, pre-sewing:


      I don't have kids; I am actually making these to put in our two shoeboxes this year for Operation Christmas Child.  Operation Christmas Child is a ministry of Samaritan's Purse (originally Billy Graham's ministry, now run by Franklin Graham) that packages and sends millions of shoeboxes filled with small gifts and basic necessities to children all over the world.  I have been involved with OCC since I was in junior high, either through packing shoeboxes or volunteering at the processing center here in Orange County.  Last year, my husband and I packed two shoeboxes, for a boy and a girl in the 10-14 age range, filling them primarily at back-to-school sale time, when you can get school supplies really cheaply.  This year, our boxes will probably be for two boys in the 5-9 category.  I picked up some flip-flops on sale for about $1 each, and plan to pack these two totes, along with notebooks and/or coloring books next month.  The great thing about this project was that it was very inexpensive; the gusseted tote bags I got on clearance were just 30 cents each, and I was able to make each monster face from one sheet of felt at 33 cents each!  The crayons were the most expensive part, and an 8-pack was only 99 cents.

One finished tote (so far):


Stegosaurus Softie


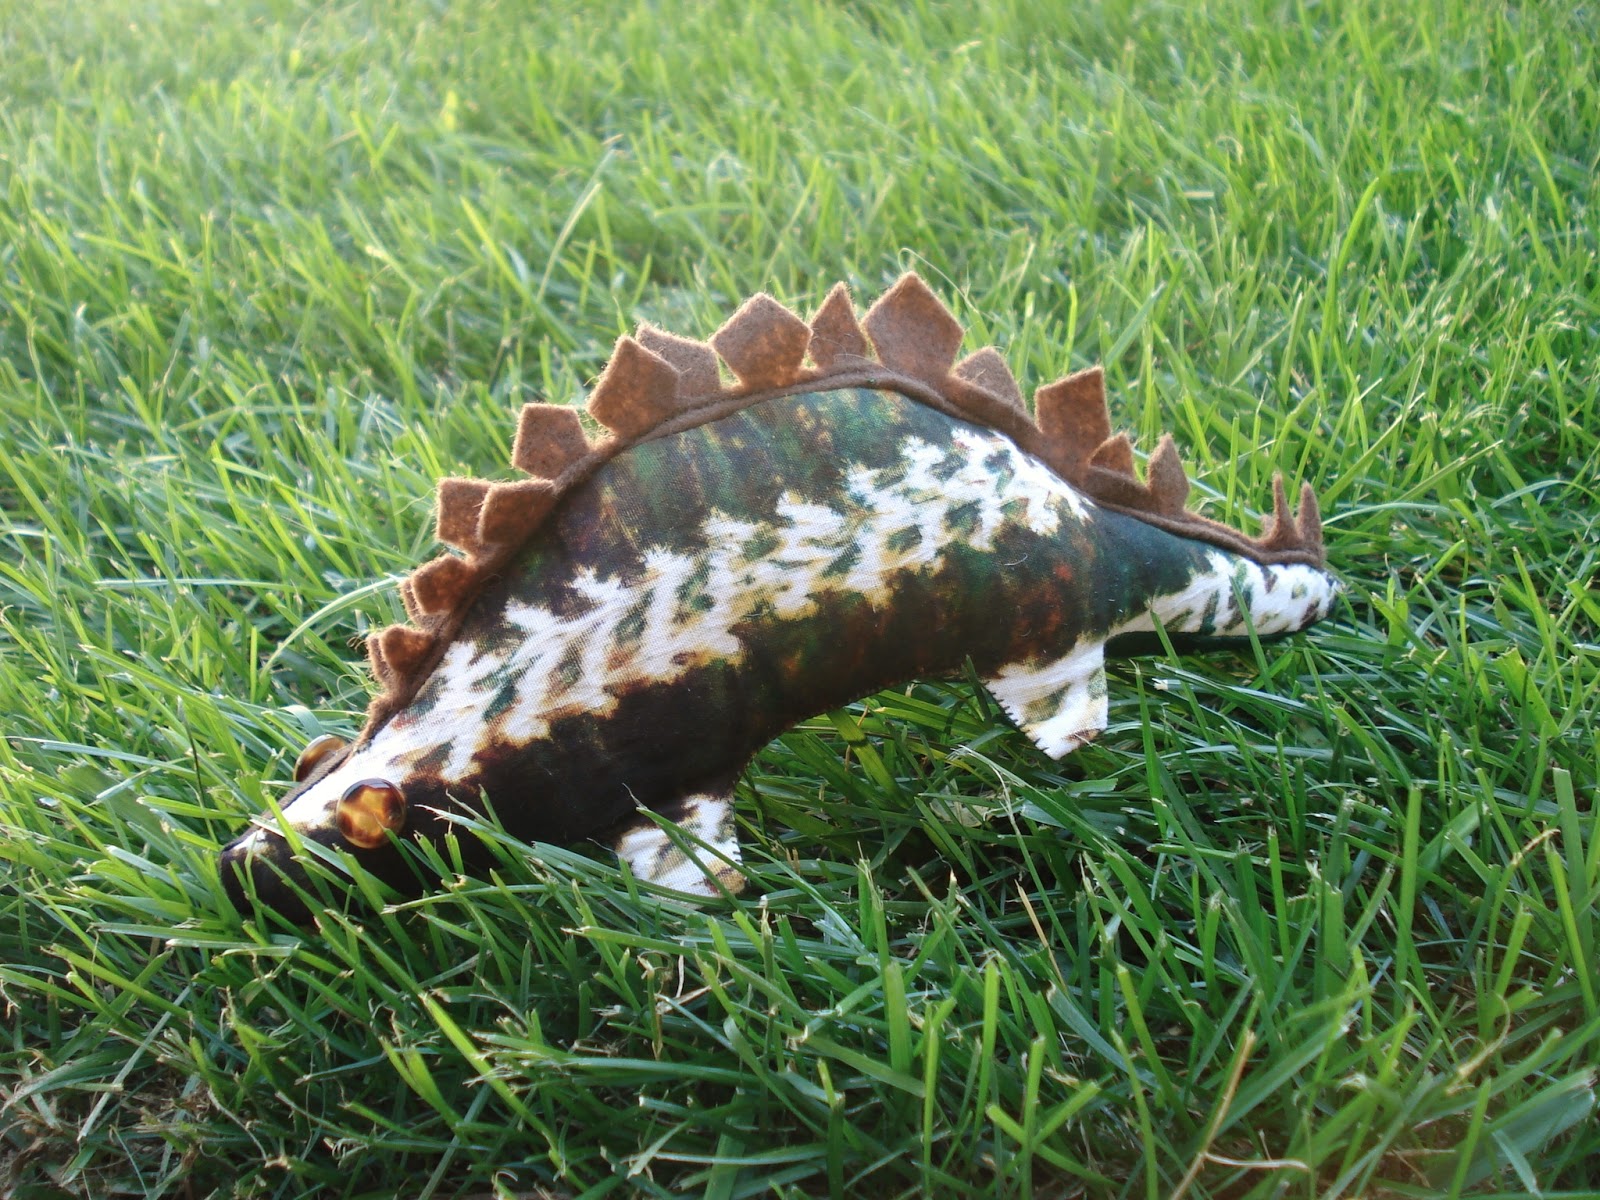
      Ever since I saw this pin and attached tutorial for a felt stegosaurus, I knew I'd have to make it eventually.  I am married to a huge paleontology buff -- we have dinosaur toys models on shelves in our bedroom; I'm not kidding.  Then my sister sent me fabric scraps from Africa (she's been volunteering as a teacher in Tanzania, and will be returning next month -- shameless plug for her blog here) and I knew I had to figure out how to use those. 

      The tricky thing about this project was that the tutorial gives you a pattern for a felt softie, but I needed one with fabric in mind.  I ended up drawing my own pattern (don't do that, just use the printable one the tutorial gives at the end of the post) and adjusting it for fabric.  It was certainly a challenge to have to think about how to make this work with seam allowances.  I knew from the beginning there was no way I'd use anything but felt for the spinal plates!  I screwed up the sewing of the felt to one fabric side of the body, so I was trying to fix that for awhile afterward.  It turned out alright, but I wish I'd had little black beads for the eyes like the original blogger had.  Since I wanted my stego to have a face as soon as I finished him, I made do with what I had.  My husband approved, anyway. :)


      Isn't this African fabric great?  I used a solid green portion of the same fabric for the underbelly.

Baby Door Muff


      So a friend of ours is having a baby this fall, and that is all the impetus I need to go nuts with all the fun baby craft and sewing projects!  I have tons of them pinned to my sewing for kids board on Pinterest, but I thought I'd start off with this one, since I expected it would be a quick project and something I could make with materials I had on hand.  This baby door muffler or 'door muff' is available for sale on Etsy in various colors.  It lets you open and close the baby's door without the click, so you don't wake the baby, and keeps toddlers from locking themselves into a room.

      I had some denim scraps left over from the denim quilt I finished recently, so I thought I'd use some of those.  I also wanted my door muff to be gender neutral, and denim works pretty well for that idea.  Basically, the door muff ended up being three layers of denim, with the ends sewn down around two elastic hair ties.  The elastics serve the same function as the ribbons, but are a little less girly, and perhaps more straightforward if you ever want to take it on and off.  It sounds simple, but it took longer than you might expect to get the measurements right.  Also, my sewing machine was being extremely uncooperative.  Anyway, the basic finished product was boring, so I added two felt stars to hint at a night sky theme.  Here it is!


Sunday, July 14, 2013

Denim Rag Quilt

      When I saw this picture on Pinterest (no real link attached), I thought it was a brilliant idea for old jeans, because you could make a quilt with such character, and reuse clothes you might normally donate or toss.  I was given a pair of very light blue colored jeans by a friend, and I knew they wouldn't be worn, but the color was unique enough to inspire me to make this happen.
      This quilt was the first I did 100% on my own, start to finish.  My only previous quilt was from a kit, with all the pieces pre-cut, including the fringe (it was a fleece rag quilt).  Although this was a little intimidating, I loved the idea and wanted to make one for a picnic blanket, (that I could maybe even use this summer) so I was motivated.  I bought the denim from thrift stores in the form of denim dresses and jeans at good sale prices.  This way, I avoided buying denim fabric new, which runs $12/yard, and got the additional character pieces like pockets and pleats (from a dress bodice).  I recommend against doing what the picture shows, with all the seams running across and sewing on waistbands to keep the labels, because it was hard enough to sew through 4 layers of it when all my fabric was smooth.
      I also made sure to get denim that was generally lighter weight (my machine is by no means industrial strength).  If you do buy the denim new, I think my weights were in the 7-11 oz range, and I recommend keeping it under 11.  I say this not only so you don't kill your machine but because if you go heavier the finished quilt, especially if it's bigger than mine, will weigh a ton!  I wasn't sure how well the quilt would turn out if I left it fringed all around the outside, so I went ahead and put some quilt binding on it.  It was really easy, but I think you could go either way.  I think it makes it look a little more put together, and hopefully it'll hold up a little better long-term.
      If you're going to tackle a denim quilt, make sure you buy the special denim sewing needles for your machine, some heavy duty thread, and definitely spring action sewing scissors like these.  Here's my finished product! I'm pretty proud of it.


Here's a close-up so you can see the cool square with buttons I got from a pleated dress bodice.   I ended up with 4 pockets, so I put those by the corners so I can hold down napkins or keep track of silverware on a picnic.


      I also used the ties from one of the denim dresses to make a tie for my blanket to keep it neat when it's rolled up. 


Sunday, January 13, 2013

Doily Shirt

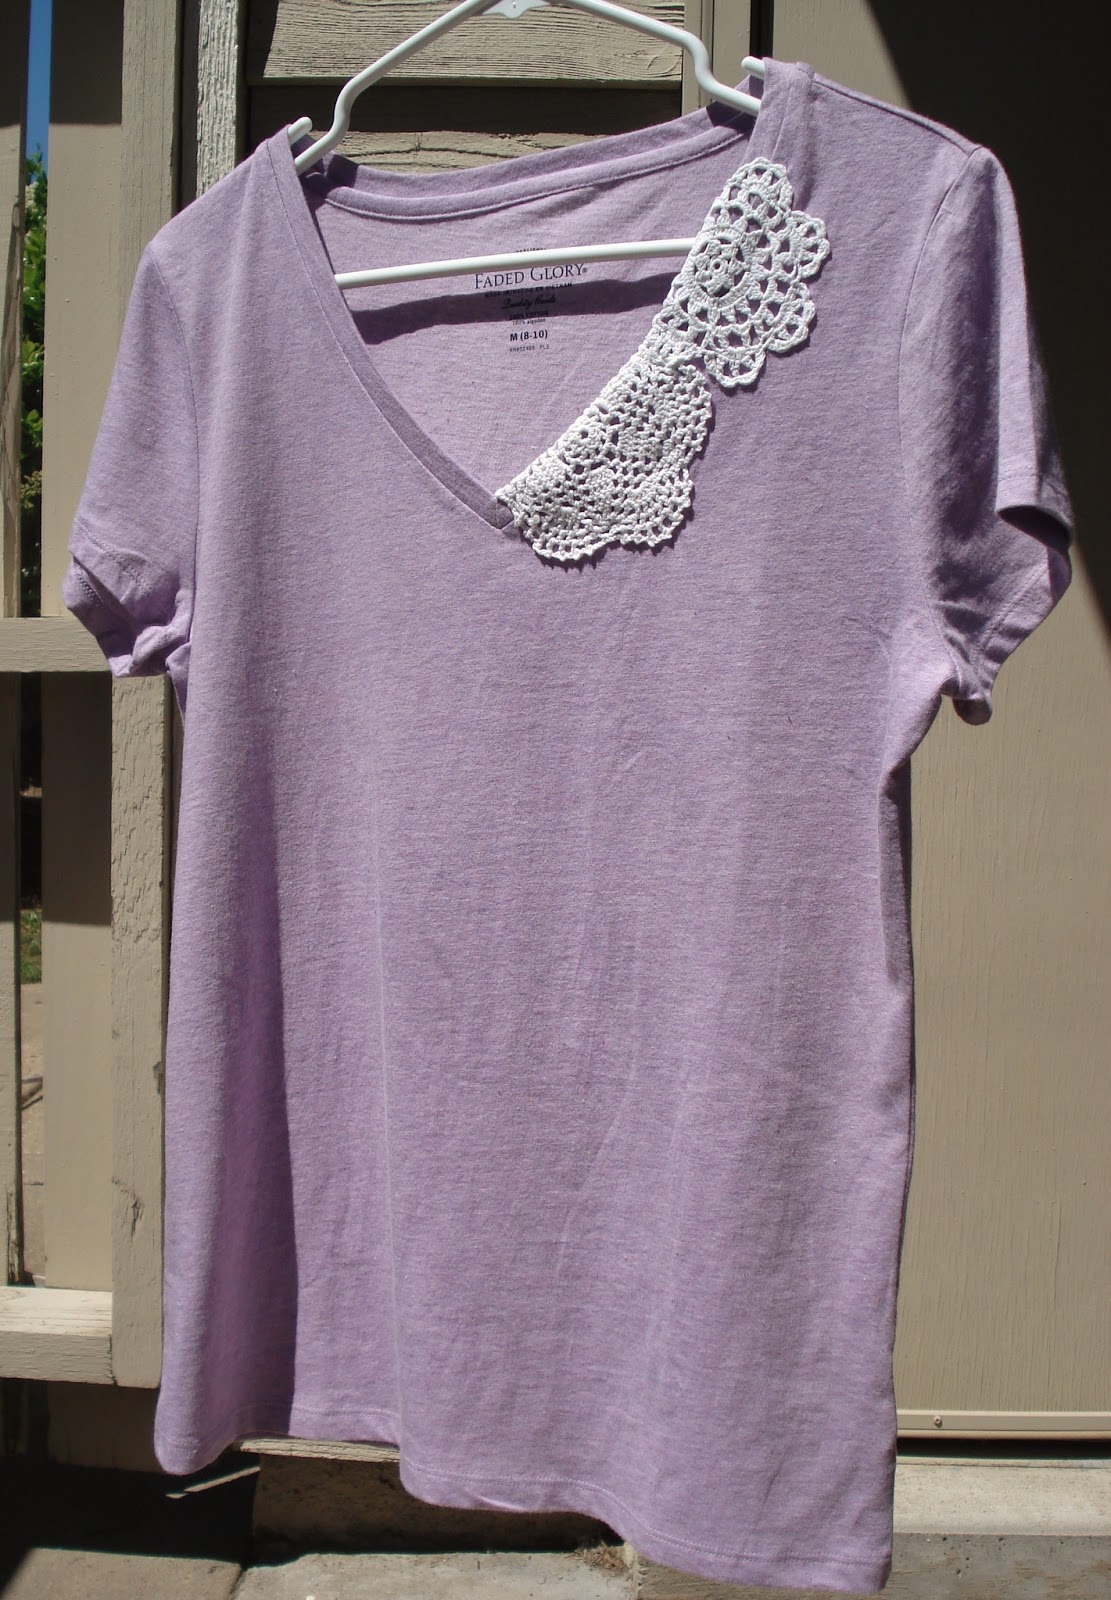
     One thing I would love to get more into is refashioning.  It's a great way to upcycle thrift store clothes or hand-me-downs, and some people make things incredibly creative and chic.  It takes a certain eye to see clothes' potential, and I'm not sure I have that, but I am capable of copying others' work! ;-)

This is one example of something I have been able to do -- here's theirs: 

Here's mine:

I used leftover doilies from my wedding, and I mostly got those on eBay, in case you were wondering.

Sweatshirt Bag


 Do you have a favorite sweatshirt that you can't wear anymore?  Wouldn't it be fun to turn it into a bag?  I do! I did!  I got the idea from this pinned link, and again elsewhere.  Mine turned out differently than these; I liked the original idea but I didn't think I would use it as a purse or messenger bag often, so I made mine an athletic-style drawstring bag. 


I sewed up the sides and bottom, and transplanted the drawstring from the hood to the top of the bag. I made the strap from one of the sleeves -- only one strap because I never use athletic bags like backpacks on both shoulders -- and securely attached it to the bag and itself (it was from 2 pieces).


This is my cat, Fritz, enjoying being out on our patio. :)

Christmas Stockings

      This pin links to a wonderful tutorial over at Sew Like My Mom, which I painstakingly followed to make Andrew and myself stockings for our first married Christmas. Her applique part would've been great if I had had the right materials.  Since I live in a small town where apparently no one sews, I was hard pressed to make it work.  Hers are a lot nicer than mine, but possibly because she's also quite a bit better at sewing than me!
     Here's how mine turned out:

Christmas Tree Skirt


 This pin links to Teal & Lime, which has a tutorial for how to make a Christmas tree skirt out of a round tablecloth.  This is great, because it's pretty simple but looks nice, and you could even upcycle an older or thrift store tablecloth.  I love mine, and really enjoyed having it under our tree this year!

Mine was $10 at Target (it could be cheaper if you caught them on clearance!) and a great fabric and color.  It looked lovely under our tree, nestling our gifts.


Tutorial: Dress Shirt Aprons


Alright, so this post is a tutorial for those dress shirt aprons circulating on Pinterest, that I showed you in my previous post. Here we go.

1. Find a dress shirt that you want to use. I recommend going one size up from your regular size. It's okay if it has a blemish or two (thrift store finds are great for this!), especially if they're going to be covered, which you can determine from reading through this tutorial.

1. Check the size on a helpful friend or the person for whom you're making it.  Check how you want it to lay and how much extra you have in the back.
2. Mark with chalk & measure to check the evenness.
3. Cut back panel up to 1-2 inches from the collar or to the horizontal back panel. Plaid is great for this because you have lines to follow! Love it.
4. Check that the head opening fits so you know how many buttons to keep buttoned. (You will sew up the front, so you want to make sure they can slip it on and off their heads easily.)
5. Mark where you want the sides to be, measuring for evenness from the armhole and collar. Make sure you leave seam allowance. You can use something long and straight to mark it, but it's not necessary because the edge will curve along the body and isn't going to really show if it's not straight. 
6. Mark the back, angling down slightly and meeting in the middle.  You can also just use the seams, but I like letting it wrap around so the wearer can lean a hip against the counter and protect their clothes.

7. Cut where you've marked. On the front I cut just slightly in from the side and then cut the top layer (front panel) only. Cut the back panels.
8. Mark the collar, leaving seam allowance. Pinking shears would be helpful here to lessen how much you have to fold into the seam. 


9. Mark the bottom of the side panels if you want to trim them straight, leaving seam allowance.
10. Fold all your edges over, iron, and pin down. I do sides first, then side panels, then collar, making sure the collar lies flat and evenly (start in the center if you need help keeping it even).  Another option at this point is to use bias tape for all the edging. If you want to do that, check out this tutorial for bias tape

11. Sew up the front, avoiding the buttons. (Seriously, my needle caught the edge of a button and snapped it in half on one of the previous aprons!)
12. Sew around the sides; I started at the bottom left (looking at the wrong side).

Pockets

     In general, I use the sleeves for the ties and use the cuffs as pockets, though if you use bias tape it takes care of the ties.  On my first apron, the cuffs were the style you have to use cufflinks with, so they were stiff and large, perfect to use as pockets.  For the second apron I made, the sleeves had those pulls that let you shorten the sleeves, so I used those and the buttons on them as decorative accents on my pockets. This third apron had pockets with pleats and two buttoning options.  The pocket style you choose really depends on the existing style of the shirt sleeves, because each is different and lends itself to a different look for your pockets.

13. Iron pockets once you cut to size; lay them out to match size and position, marking with chalk.  Since I used the cuffs, I'll sew up the "fly" on my pockets so they don't gap.
Sewing pockets: I usually attach mine by sewing the bottoms, hanging down, right sides together, and then fold up and sew the sides, wrong sides together.
Ties
14. Using a long segment from the back panel, cut two long pieces. Mine are about 26 inches finished.  (If you keep side panels, it doesn't matter so much that they're long.)  Fold the strips into itself like bias tape, each side in, then together, iron and pin.  Sew down but leave about 4 inches at one end to connect to the body of the apron. Fold one end over and sew down. I kept the finished edge (from the bottom of the back of the shirt) to connect to the apron. 
15. Connect the ties to the aprons by slipping the apron corner inside the fold of the tie. I sewed the ties around in a square to hold it well.

Enjoy your new upcycled apron!